Google Display Network Advertising For Your Clients Part 2
Share on 


Jun 7, 2017 by Mark MaierYesterday was the Anniversary of D-Day and our blog post was kind of like the first wave of troops hitting the beaches, today, we build a beachhead with part 2 of our look at the Google Display Network from The Digital Marketer blog....
"
The Display Grid: Part 2…
We’ve now covered all the different targeting options inside of GDN, which run across the top row of The Display Grid:

With everything we’ve covered here, you should be looking at the Google Display Network in a brand-new light.
(NOTE: Need customer acquisition training? Get a guaranteed traffic plan and system for acquiring new customers from all traffic platforms with DigitalMarketer’s Paid Traffic Mastery Certification. Learn more here.)

Part 2: GDN Ad Formats and Advanced Tips for How to Use the Display Grid
We’ve now covered all the different targeting options inside of GDN, which run across the top row of The Display Grid:

Now, in Part 2, I’ll go through all the different ad formats, which you can see in the left columns on the grid:

When you put the two together, the resulting table shows you EVERY possible ad + targeting combination possible on the Google Display Network.
Finally, I’ll show you some of the more advanced ways to use The Display Grid to start building effective GDN campaigns and achieve massive scale in your business.
So, without further ado, here are…
The 11 Different Ad Formats on the Google Display Network
The right ad can make all the difference for your GDN campaigns.
It’s not uncommon to see an enormous difference in terms of performance from one ad to another, even when all the targeting options are the same:

This is why it’s so very important to run the best-performing ads possible inside your campaigns.
So, the next question is:
How do you know which ad is going to perform the best?
The unfortunate answer here is… you don’t.
 Nobody knows which ad is going to resonate best with your prospects. I don’t care how much of a marketing expert you are, or how familiar you are with your target market. You never know for sure which ads will work best until you test them.
And that’s why you should always be testing many different variations of each type of ad in your Display Network campaigns.
When you click the red “+ Ad” button inside Adwords, you’ll see a list of all the possible GDN ad types available to you:

Now, let’s dig in and examine each of these possible ad types in more detail:
Google Display Network Ad Format #1: Responsive Ads
This is Google’s current default ad type. And the concept behind Responsive Ads makes a lot of sense:
Just supply an image, a URL, a few lines of text, and Google will automatically resize and add/remove text to make your ad fit in just about any available ad placement:

Unfortunately… I’m not a big fan of responsive ads (at least not yet).
The problem with Responsive Ads right now is that you don’t get enough control over how they display or what the performance was of those ads. I like to be able to specify how I want my ads to appear in more detail—so I know exactly what size it will be, exactly what the text will say, and so on.
Why am I such a control freak?
Simply because I know that the performance of an ad can vary tremendously, even when the only difference is the ad’s size.
For some of our accounts—about a quarter of them—switching to Responsive Ads improved our results. But for the remaining three-fourths of accounts, performance actually got WORSE when we turned on responsive ads.
So, by all means, feel free to test these out in your campaigns, just be aware that you’re liable to get better performance with other ad types. (At least until Google improves Responsive Ads to give you more control over the way they display.)
How to Create Responsive Ads
When you click “+ Ad” and “Responsive Ad,” you’ll be taken to a screen that looks like this:

Here you can supply all the separate ingredients that will make up your responsive ad:
- Short Headline
- Long Headline
- Description
- Business Name
- Final URL
- Images
Then Google will mix and match these elements to fit your ad into many different placements spots across the Display Network.
Google Display Network Ad Format #2: Image Ads
Most people start their display campaigns with image ads, and with good reason.
A good image ad can stand out on a web page, grabbing your prospect’s attention and send a steady stream of engaged traffic to your landing page. And because they come in many different sizes, image ads also have a lot of placement options available.
Now, here’s a little hint to help you create better image ads: When most marketers are getting started, they’ll pay a designer to create one image ad in 14 different sizes.
This is NOT the right approach.
One ad in 14 sizes is still one ad. You aren’t really testing any variations, and your chances of hitting a homerun with your very first ad are very low.
Instead, I recommend choosing just one size—start with the medium rectangle (300×250 pixels)—and have many different ad layouts created for that one size, using a combination of different text and images:

Then, after you’ve found an image design that performs well, you can start to test different sizes.
How to Create an Image Ad
When you click “+ Ad” and then “Image Ad,” you’ll see a screen that looks like this:
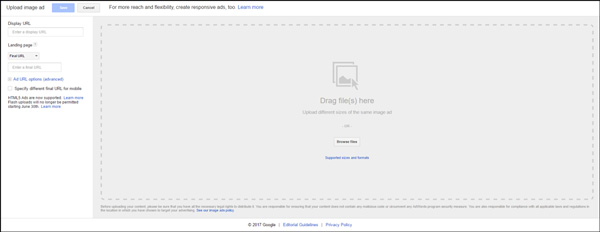
As you can see, there aren’t many options here. That’s because you’ll need to have your image ads already created by a designer before you upload them to Adwords.
If you don’t have any image ads created and you want to get started right away, Adwords also has a feature you can use to get started with some quick and easy ads right off the bat. To do that, click “Create an ad” when you see this lightbox:

Next, Adwords will show you a handful of banner ad ideas based on some of the images it finds on your website:

You can use this tool to create your first few banner ads in a matter of minutes. But if you’re serious about scaling your campaigns on the Google Display Network, eventually you will want to have your own ads created by a professional.
My company, WebSavvy, now offers this service based on all the data we’ve collected spending millions of dollars on ad spend and testing literally tens of thousands of different ads.
Google Display Network Ad Format #3: Expanded Text Ads
Adwords recently retired their standard text ads and replaced them with “Expanded Text Ads,” which give you two headlines along with a description:
This new format gives you more room to write some convincing copy and convince website visitors to click through to your landing page. 
Text ads don’t stand out, visually, the same way that image ads do. But there are some significant benefits to running text ads.
For one thing, text ads are quick and easy to create… which makes them a great way to test new ads quickly and get fast feedback on which marketing messages are resonating with your prospects.
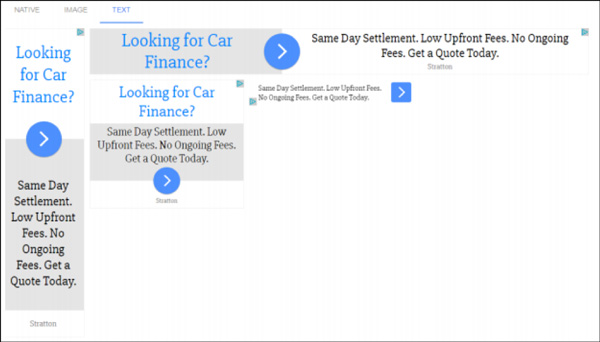
How to Create an Expanded Text Ad
When you click “+ Ad” and then “Expanded Text Ad,” you’ll see a screen that looks like this:

From here, simply add your text along with the final URL of your landing page.
While you’re at it, you might as well go ahead and create at least a handful of different text ads. Write a new ad that focuses on each of your product’s or service’s main features, benefits, and selling points.
Once you find which text ads convert best, you can use the copy from those ads to create a killer image ad!
(RELATED: The Ad Grid: How to Build Traffic Campaigns that Convert Higher and Scale Faster)
Google Display Network Ad Formats #4-6: App, Lightbox, & Video Ads
Other ad options include App, Lightbox, and Video ads. These are beyond the scope of this article, as they’re used by only a tiny small fraction of advertisers.
Google Display Network Ad Format #7: Gmail Ads
This is one of the most commonly overlooked types of ads in the Google Display Network, which is a real shame—because Gmail can be one of the best-performing placements on the entire Display Network.
Gmail ads give you two main options:
- You can show an individual ad (which can contain a YouTube video or an image)
- You can show product images
When you run a Gmail image ad, your ad will show up directly in the person’s inbox like this:

When they click on your “collapsed” ad, they won’t be taken to your landing page immediately. Instead, they’ll see an “expanded” version of your ad:

If they click on this expanded ad, then they will be taken to your landing page.
You can also run product ads from within Gmail:

Very few people are doing these product ads inside of Gmail right now. You know what that means? There’s a big opportunity there for anyone in ecommerce!
How to Create Gmail Ads
To create Gmail ads in Adwords, first, click “+ Ad,” and then, go to the “Ad Gallery”:

From there, go to “Gmail Ads”:

That will take you to this screen, where you can explore all the different types of Gmail ads available:

Once you choose which type of ad you want to create, the rest of the process is pretty straightforward. Just add your text, logo, and images as requested on the next screen:

(NOTE: Need customer acquisition training? Get a guaranteed traffic plan and system for acquiring new customers from all traffic platforms with DigitalMarketer’s Paid Traffic Mastery Certification. Learn more here.)
YouTube Ad Formats on the Google Display Network
Don’t forget that the Display Campaign also handles advertising on YouTube, which is a pretty big deal in its own right (it’s only the #2 search engine in the world  ).
).
Many marketers write off YouTube ads altogether because they don’t have video ads or assets. But you don’t even need videos to get started with YouTube ads!
 YouTube offers four different ad types, and only half of them require a video on your part.
Just be sure, when setting up YouTube ads, to put them in a separate campaign—because you can get much cheaper clicks on YouTube, and you’ll want to keep those campaigns separate to keep your data clean.
Here are the four types of ads you can run on YouTube:
Google Display Network Ad Format #8: YouTube Image Ads
Just as with the rest of the Google Display network, YouTube allows you to place image ads (almost all placements you’ll have access to are the medium rectangle size, 300×250).
Your ad will usually show up next to the video, like so:

If you’re precise in your targeting, your ads will show up next to highly relevant videos—which means the person watching the video has a good chance of being interested in your ad.
Google Display Network Ad Format #9: In-Video Overlay Ads
Overlay ads are another type of image ad. But instead of displaying next to the video, overlay ads actually appear in the video itself (near the bottom, just over the video controls):

Overlay ads are 480×70 pixels and can include an optional companion banner (300×250) if you want both an overlay and a banner ad to display in the same video together.
Google Display Network Ad Format #10: TrueView in-stream Ads
Being a site full of videos, YouTube is probably best-known for its Video Ads. (Makes sense I guess.)
In-Stream video ads are a great way to get your prospects’ attention with a video that is funny, helpful, interesting, or surprising in some way.
There are two main types of Video Ads: skippable and non-skippable. Skippable ads are the most common—these are the ads that run before a video and have a “Skip Ad” button in the lower right:

After five seconds, users have the option to skip the Video Ad and jump straight to the video they’re waiting to watch.
Skippable TrueView Video Ads can deliver a great return on investment, especially because you won’t be charged for people who skip your ad after five seconds.
Instead, you’re charged only when the viewer interacts with your video (such as clicking on one of your call-to-action links) or watches at least 30 seconds of your ad.
Non-skippable ads can’t be skipped, and, because of that, they are usually shorter in length—running 15, 20, or 30 seconds long (although Google announced that they are doing away with 30-second non-skippable ads in 2018).
YouTube also offers a non-skippable six-second video ad called “Bumper Ads.” Both of these types are bought in a different way and it’s totally fine to ignore these for now.
Video ads are the MOST difficult and time-consuming type of ad to create, so unless you are already doing video, I would recommend getting started with text and image ads first.
Once you nail down which marketing messages are the most effective, you can translate those messages into video format and really scale your campaigns on YouTube.
Google Display Network Ad Format #11: Video Discovery Ads
This type of ad allows you to promote a YouTube video in “places of discovery,” which includes YouTube search, alongside relevant YouTube videos, and on the mobile homepage of YouTube.
Here’s an example of a YouTube Discovery Ad:

When you click on the ad, you can go one of two places: to the video’s normal “watch” page, or to the advertiser’s Channel page with that video loaded at the top, like this:

Because these ads require the visitor to click on them, they typically bring in highly engaged traffic.
How to Use the Display Grid to Scale Your Adwords Campaigns
We’ve now covered all the different targeting and ad type options available to you inside of the Google Display Network.
Phew!
When you look at the Display Grid, you can see that every combination of ad type + targeting options gives you one square in the grid:

This grid shows you every possible combination of ad and target type inside the Google Display Network. Altogether there are 147 different combinations.
Now, at first, that number might sound intimidating. Does that mean you have to open up your Adwords account and create 147 different campaigns?
Thankfully, no. Because depending on your business, market, and offer, some combinations will make sense more than others.
So, the next thing I want to do is help you narrow down your options, so you can get started with the most effective campaign types.
And to do that, there’s a thirst-quenching acronym I like to use, called:
The “BEER” Formula
Don’t worry, I’m not actually going to start drinking a beer right now.
(OK… actually I am. )
But there’s another BEER I want to go over now too, and this one is going to help you to find the most profitable GDN campaigns as quickly and efficiently as possible.
B: Bullseye
When I say “Bullseye,” what I mean is this:
Start with what is most likely to be profitable. 
So, what IS most likely to be profitable?
The answer will vary somewhat from business to business, depending on what market you’re in. But as a general rule of thumb, your best bet is to get started with these targeting options:
- Remarketing
- Customer Match
- In-Market
- Contextual
Affinity
Assuming you already have traffic coming to your site, Remarketing is almost certain to be your lowest-hanging fruit. If you aren’t remarketing, you’re leaving money on the table.
(RELATED: The Remarketing Grid: The Science of Ad Retargeting Audience Segmentation)

After setting up remarketing, your next step should be to set up Customer Match. This allows you to show ads to your buyer list, which should generate a TREMENDOUS ROI on your ad spend.
Once that’s done, you should also create a separate campaign targeting people who are similar to your customer list.

Next, take a look through the in-market categories to see if one applies to your business. If it does, this is a great way of targeting people who are in the market for your product or service.

Remember, you can browse through all 500+ in-market categories by clicking the “InMarket” tab at the bottom of TheDisplayGrid.com:
(RELATED: 3 Advanced AdWords Tactics That Increase ROI)

When you’ve finished taking advantage of in-market targeting, next it’s time to turn to contextual targeting. Your ads will be shown alongside relevant content, so these ads should bring you a steady stream of highly engaged traffic.

Finally, notice that #5 on the list above (affinity) is crossed out.
Generally speaking, you don’t want to use affinity targeting on its own. Feel free to test it in combination with other targeting methods, but by itself, it’s just too broad. It often leads to your ads showing up all over the Internet, resulting in some of your least profitable Display Network campaigns.
And to help you find the “Bullseye” in your campaigns, here are a few more targeting tips that make up the happy acronym GLAD:
- Gender: If your product is particularly skewed to one gender or the other, you should start by only showing your ads to that one gender (at least for now).
- Location: Is your product capable of being sold all around the world? That’s great. But it doesn’t mean you should target the entire world. Instead, use the 80/20 principle and start by targeting just the U.S. Heck, start by targeting just California, or San Francisco. The GDN is such a huge network that you can begin with very tight targeting and still generate TONS of traffic.
- Age: If your product skews to a certain age group, start by excluding all other age groups. Selling women’s fashion for 18-25-year-olds? Don’t show ads to anyone over 25. Selling travel insurance for seniors? Don’t show ads to anyone under 55.
- Device: If your audience has an up-to-date phone, you can target them specifically by their device. Selling iPhone accessories? Only show your ads to people using an iPhone.You can also use this information to target desktop/mobile users in general. After you get a little data, you may find that your campaigns perform better on either desktop or mobile. If that’s the case, then only run your ads for those users!
E: Epic Automation
Automation is a great way to improve your campaign performance while also saving time.
Here are some of the things you can automate in Adwords:
- Spend
- Placements
- Ads
- Reporting
- Analysis
And here are some of the tools you can use to do this automation:
- Auto rules inside Adwords
- Scripts
- PPC Samurai
- Optmyzr
Here are a few examples of some easy-to-set-up automations to get you started.
An Example of Automating Ads
When automating your ads, look at cost per acqusition (CPA) first and foremost.
Using the auto rules inside of Adwords, you can choose to pause any ad when it reaches a certain amount of spend without generating any conversions. Here’s an example of an auto-rule that will pause any ad that has spent $20 with zero conversions:

So, when, exactly, should you pause a poor-performing ad? (Or ad group or campaign?)
First, you’ll need to decide on your target CPA. For this example, let’s say your target CPA is $10. From here, my recommendations are pretty simple:
- Pause any ad with a CPA that is twice your target CPA. (In this case, pause any ads with a CPA of $20 or more.)
- Pause any ad group with a CPA that is 3x your target CPA. (In this case, pause any ad groups with a CPA of $30 or more.)
- Pause any campaign with a CPA that is 5x your target CPA. (In this case, pause any campaign with a CPA over $50.)
An Example of Automating Placements
As your campaigns start to generate data, you’ll start to discover placements that don’t perform well.
Please don’t try to go through all your placements by hand, though. There will be way, way too many to go through manually.
Instead, I like to write a simple script to pause poor-performing placements automatically. You can schedule it to run every day, or even hourly, to minimize any wasted spend on these poor-performing placements.
Here are some of the things you’ll want to look out for when automating placements:
- Unusually high click-through rate or cost per click (this could be click fraud)
- High spend with no conversions
- High CPA
E: Expand the Winners
By this point, you’ve got at least 6-12 campaigns running. Some of them will be very profitable, some will be borderline, and others will be losers.
What many marketers do at this point is to focus on the losing campaigns, trying to fix them.
This is the wrong approach!
Instead, you want to pause the big losers and work on scaling up the campaigns that ARE working.

For example, if you have 10 keywords that are bringing you a great CPA, add 100 more! Make sure to include every variation on your most profitable keywords. So, if “fast company” is a keyword, try all these variations:
- fast company
- fast company com
- fastcompany.com
- fast company site
- fast company magazine
(Make sure to put every keyword in a separate ad group, so that you can find the best-performing ad for each keyword separately.)
R: Repeat
OK, so you’ve started with the campaigns that are most likely to be profitable…
 You’ve automated everything possible to cut down on your manual work…
And you’ve expanded your winners to scale up.
All that’s left to do now is repeat the process again using a new square from The Display Grid!
This gives you a repeatable process you can use to scale your campaigns, over and over again. There’s almost no limit to how much scale you can achieve using this method.
One Final Thing to Keep in Mind
To profitably scale your campaigns on the Google Display Network as quickly and efficiently as possible, you’re going to have to FAIL. A lot.
Get comfortable with it.
The most successful media buyers are the ones who aren’t afraid to fail. Instead, the actively seek out failure…
…because they know they have to find the losers in order to find the winners.
So, don’t be afraid to fail. Be bold, and know that you will create some losing campaigns.
But in the process, you’ll also find the winning ad + targeting combinations that will help you achieve massive scale in your business. 
Hopefully, the Grid has given you a different way of thinking about scaling up your campaigns, along with some new ideas to get better results from the Google Display Network
Related Categories
